

You May Also Like
Father's Day Project: Build A Frame For Your Wall-Mount TV
June 09, 2015

Looking for a project to do with dad this Father's Day? You've seen the gift guide, know the date (June 21st - just in case it slipped your mind), but why not take it a step further and spruce up pop's "man cave" with an easy woodworking project that's perfect for dad, son, and even grandpa to do together? That's right, if you couldn't guess from the title of this post, we're talking about crafting a frame for dad's wall-mounted flatscreen TV. Learn what it takes to make this project count, the tools you'll need, and more - right here on the Nail Gun Network.
Let's start with the basics. You'll need an 18 gauge brad nailer and brad nails, a 23 gauge pin nailer and micro pins, some wood glue, a tape measure and a miter saw - oh, and of course, the wood for your frame and molding. Once the frame is complete, you'll probably also want to stain or paint it, and add felt strips to the inside of the box to prevent scratching the TV once it's inside. Mounting elastic bands (or something similar) to the back of the frame will help to keep the box level and prevent any slipping.
To start the project, you'll need to measure the dimensions of the television itself. Don't forget to measure depth too, to determine how thick the frame needs to be. Dimensions should be about 1/8" larger than the television itself. Once you've cut the box, you'll use wood glue and brad nails to secure the frame.
At this point, you have two options, you can simply stain or paint the frame, add the felt lining and elastic bands on the back to prevent slippage, and insert around the TV - or you can cut decorative trim to dress up the box frame and give it additional visual appeal.

If you opt for decorative molding, leaving the 1/8" overlap where molding meets the frame, add twice that amount to the dimensions of molding that you cut. Make your miter cuts to the flat side of your molding - this will be integral to achieving a picture frame look for the final appearance. Use a pin nailer and micro pin nails to fasten your molding to the frame. You can also use some additional wood glue to help seal the molding where it meets at the corners of your frame.
All that's left is to mount the television and enjoy.
PROJECT NOTE: Remember that the TV needs to still be mounted to it's manufacturer specified mount. The decorative frame is NOT a substitute mount for the television.
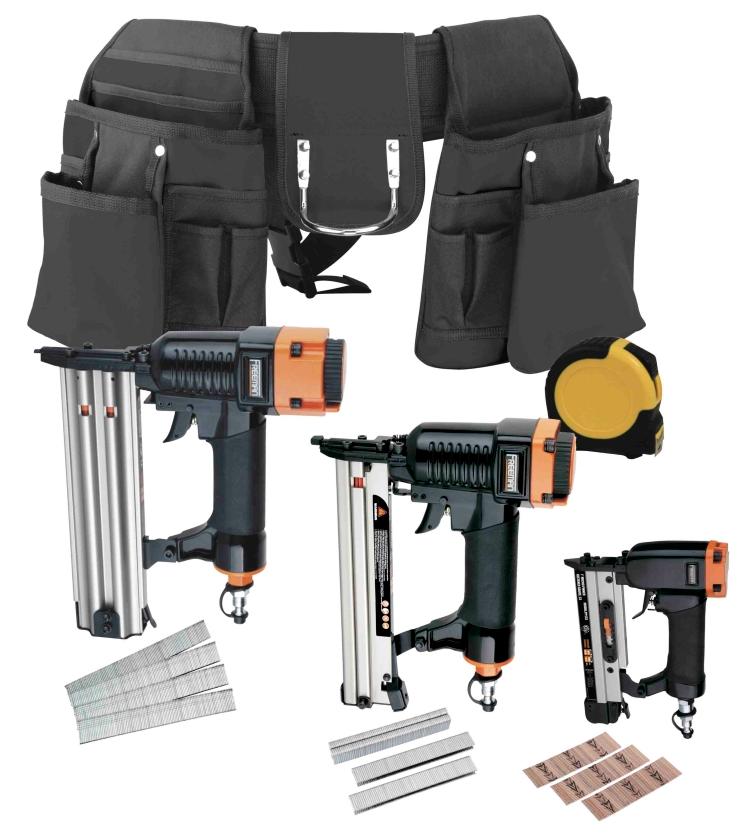
If you're looking for a great start to this project, the Freeman Tools P7TRKTM 3-tool combo kit includes most of the items required to handle this project. With a brad nailer, pin nailer and tape measure included, give dad a new set of tools to go with his brand new flatscreen TV frame.
~ The Nail Gun Depot Team
To leave the 1/8-in. reveal where the molding overlaps the frame, so weÔÇÖre adding twice that amountÔÇöor 1/4 inchÔÇöto the dimensions we cut. These miter cuts are made on the flat side of the molding so the pieces create the picture-frame look when they all go together. The frame can be fastened to the box with finish nails. - See more at: http://extremehowto.com/flat-tv-screen-frame/?page=all#sthash.LGvTXQeY.dpuf