


How To Upholster A Chair
Is your furniture starting to look dated? Maybe you have pets or small children that have torn up the upholstery on your furniture - especially in high-traffic areas, such as the dining room. New furniture can be costly, so why not refresh what you already have? In a few simple steps - and a weekend dedicated to this project - you can have a beautiful new dining room set that completely upgrades the appearance of your room, without spending a significant amount of money.
First, you have to pick out the material and design of your new upholstery. This is strictly based on personal preference, though a durable material, such as cotton or a cotton-blend, might be better suited for a piece of furniture that receives a lot of use. Linen on the other hand is one of the worst fabrics for wear, which is why it is typically used on formal furniture that does not receive heavy use.
Next, unscrew the seat of the chair from the base. Once separated, you can either remove the existing fabric from the padding, or can wrap the existing seat cover with your new one. It is easiest to just add a new layer of fabric over the old one - unless the old pad or fabric has an odor, or padding has escaped the cushion. Re-covering a bare pad is trickier, and could require additional work.
Measure the length, width and depth of the seating pad and multiply three times the amount of any given dimension to calculate the amount of fabric you will need for your surface - this rule applies to a single surface, calculate for each chair separately. Also, be sure to measure from the longest point if working with a curved or angled shape.
Similar to wrapping a present, lay the fabric facing wrong-side up on a level surface and place your chair cushion upside down on top of the fabric. Remember to align any patterns in the fabric with your seat, to ensure a clean appearance. Make sure you have enough fabric to wrap around all of the cushion's edges and fold under. Now you are ready to trim the fabric accordingly.
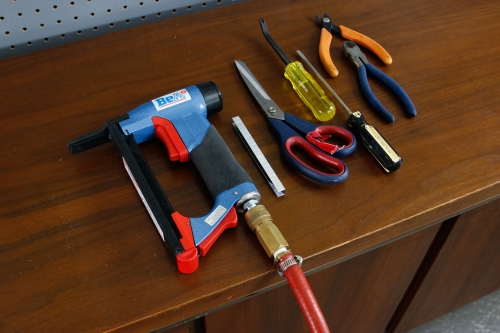
The next step is where your upholstery stapler will come into play. Take the upholstery staple gun and start stapling the folded over fabric - from the center outward toward the edges. Start with the straightest side of your seat and make sure the fabric is spread with a smooth, tight fit.
Repeat this step with the opposite side of the seat - and again with the remaining sides. Continue to make sure that the fabric does not bunch or wrinkle on the visible part of the seating surface - this most likely will require you to hold the stretched fabric firmly while stapling all sides. If you do happen to make a mistake, be sure to have an upholstery staple remover nearby.
We're almost done, however, you must first pleat the corners of the fabric on the underside of the cushion and trim away excess fabric. To pleat the corners, point the corner toward the center and fold both edges so that they run along the chair bottom's diagonal. Once folded, take your staple gun and fasten.
The cushion is now ready to be screwed back into the base of the chair. Before reinstalling, you might want to spray a fabric protector onto the seating surface to prevent staining and reduce wear. Allow a day or two for the spray on application to dry before reattaching the seating surface.
Congratulations, you now have a refreshed dining room set that can completely reinvent the design of your room. For the more experienced DIY expert, you might even sand down the chair frames and table, and refinish with a new stain or paint - if working with wood furniture.
Want to see more projects? Visit the Nail Gun Network's How To Page today for tips and tricks to get the job done.
~ The Nail Gun Depot Team