


How To Install Hardwood Floors
Senco Staple Guns Nailers Nails, Staples & Screws Projects & Applications Articles Stanley Bostitch Flooring Tools & Fasteners How-To Instructions
March 25, 2014 1

With the housing market slowly taking a positive turn, many consumers are beginning to once again buy and sell houses. At the same time, many house hunters are looking for homes they can rehab - giving them a chance to put their personal style into the home they will live. A popular trend in rehab and renovation, and one of the first things many home-buyers will add to their home if it's not already there, installing hardwood floors can enhance your home's appearance - and even add value. Learn how to install hardwood floors, on the blog by Nail Gun Depot.
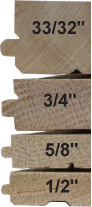
Your first step in hardwood floor installation is determining the type of wood you want to use, including species, board width and thickness. The finish and color of your hardwood flooring will play a major role in the overall appearance of a room, so make sure you choose flooring that matches your furniture, cabinets, counters and wall color. Know the measurements of the space you will be installing a new floor, to get the most accurate pricing and quantity of materials needed. Thicker wood is typically more expensive, but can add strength to your floor system. If you are working with a tight budget though, you will most likely want to use a thinner cut of wood.
When measuring a room for flooring installation, measure the width and length, then multiply for square footage. Order 10-15% extra material to allow for mistakes and irregular board lengths - such as when lining floor boards up to a wall.
Before you even begin to install your hardwood floor, inspect the sub-floor to make sure it is sturdy and free of squeaks. At a minimum, sub-flooring needs to be 3/4" thick. If there is a squeak, drive a long drywall screw into the sub-floor at the joist where the squeak happens. Be sure the sub-floor is clean and free of any debris.
Next, you will want to put down a layer of vapor barrier paper. This paper helps to prevent moisture from forming underneath your hardwood, which can eventually lead to cupping or mold if left untreated. You'll want to use 15 pound tar paper or felt, allowing at least 4" of overlap between sheets. Secure the barrier by stapling - and be sure to pencil a line on the baseboards to show where joists are located. You are now ready to begin your installation.
Start installation with the longest wall, and work your way across the room. Remove the shoe molding from the wall and create a chalk line 3/8" from the baseboard, to allow for expansion and contraction due to humidity and climate change. Begin with a long board for the first row. Line up the board's edge to the chalk line and drill pilot holes through the board into the sub-floor and joist. You will want to face nail each board at every joist, using a nail-set. Repeat this for the whole first row of boards - choosing board length at random to stagger the boards. A trick of the trade, lay all of your boards out prior to nailing, to get an idea of length and ensure the boards do not line up uniformly. Lay the floor boards perpendicular to the joists below. This will help to anchor the floor and will add to its sturdiness and integrity. A simple trick to help you determine direction, look at your sub-floor and see which direction the nails run along the joists.
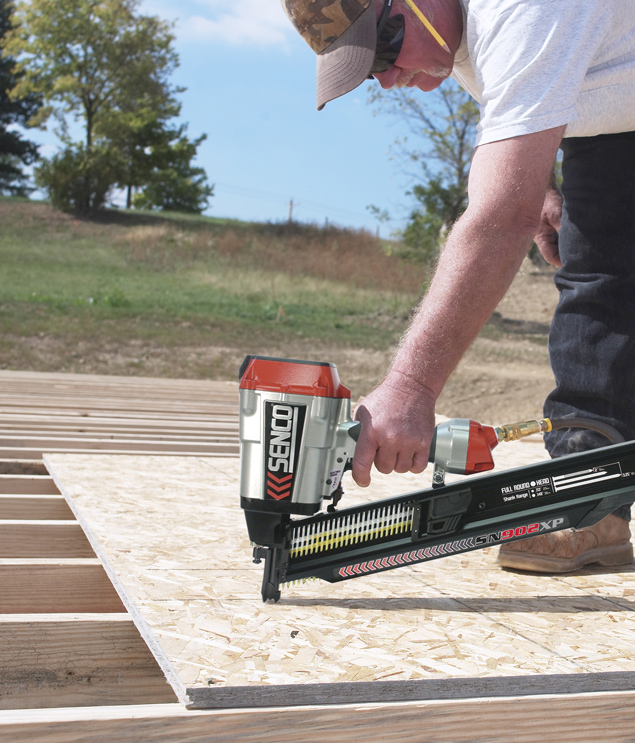
Once you have installed a few rows of boards, drill additional pilot holes into each board's tongue, and hand-nail the rolls. Once you have enough clearance, begin using a pneumatic floor nailer. You can also use a manual floor nailer, depending on preference. Keep in mind a pneumatic nailer will probably cost a little more than its manual counterpart, but the ease of use and time that a pneumatic tool saves will justify its use in most cases. You will also need to decide whether to use a flooring nailer versus a flooring stapler. Be sure to research the proper length of a nail or staple for the tool you are using - and the board it is fastening.
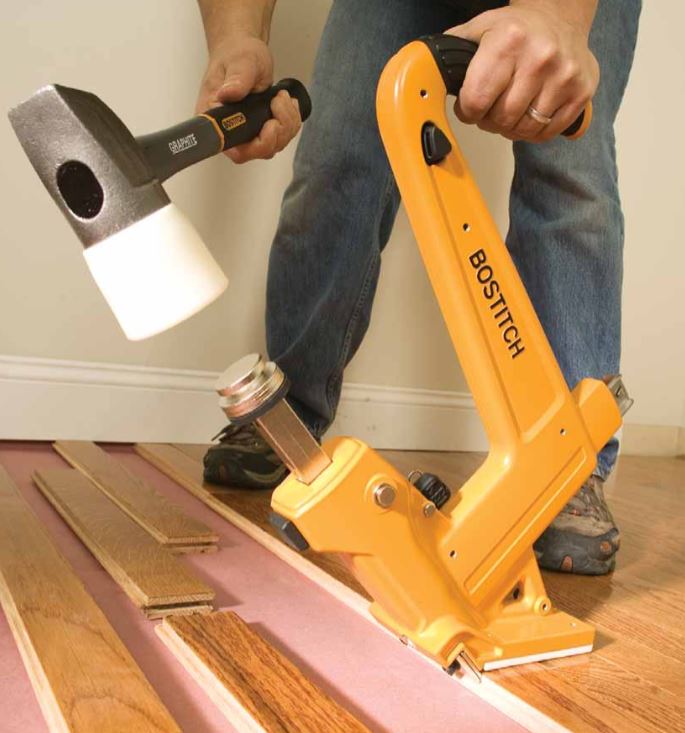
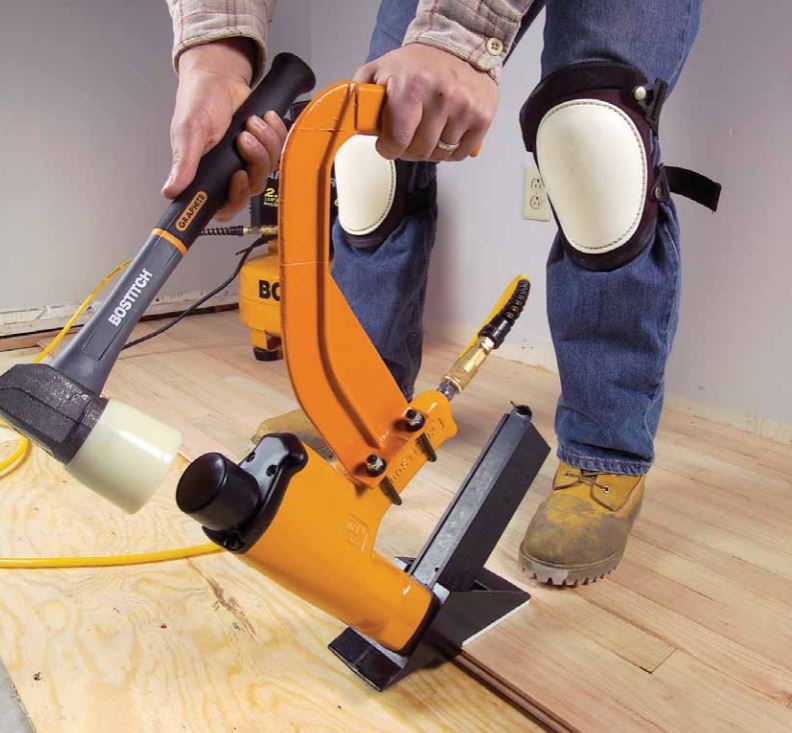
Position the lip of your pneumatic floor nailer over a board's edge and strike firmly, using a flooring mallet. This will drive the nail into the tongue of the board. The industry standard, drive at least two nails per board - placing them roughly 10" apart. For tongue and groove flooring, make sure each end fits into the corresponding end of the next board. If this is not completed properly, your floor will be left with fairly large gaps. When you approach the opposite wall from where you began the flooring installation, you will again return to drilling pilot holes and using a nail-set, as the pneumatic nail gun will not fit properly.
Once the last board is secured and in place, clean the newly installed hardwood flooring with a damp cloth, using only a water and/or vinegar solution. Finished hardwood is very durable, but can easily be damaged by exposure to dense moisture, direct sunlight, heavy items being dropped, or items scratching across its surface. If you take good care of your hardwood floors, they can last a lifetime.
~ The Nail Gun Depot Team
1 Comment(s)
Cathi
Oct 22, 2016 19:12
Good way of explaining, and pleasant piece of writing to get facts concerning my presentation topic, which i am going to convey in institution of higher education.