


DIY Tips: How To Install Flawless Drywall
An important step in nearly any major home renovation project? Installing drywall. Knowing how to do it yourself can save time and money. We offer you a few tips and discuss the best tools for the job, here on the Nail Gun Network.
Fasteners First
Most new construction projects mandate the use of drywall screws when installing drywall. Screws are certainly ideal, as their thread provides better holding power, especially in climates where wood is prone to expand and contract regularly. In some circumstances, drywall nails can be used to hang wallboard, but beware; over time, nail popping and other imperfections to the wall might occur as the wood frame expands and contracts.
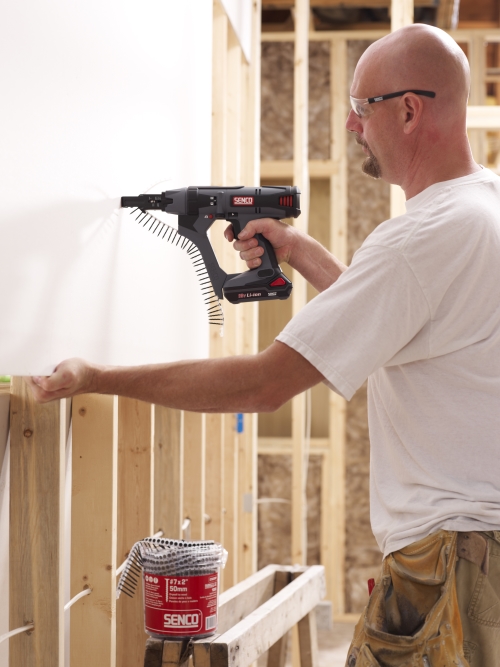
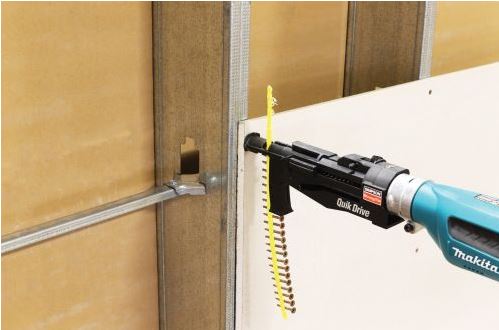
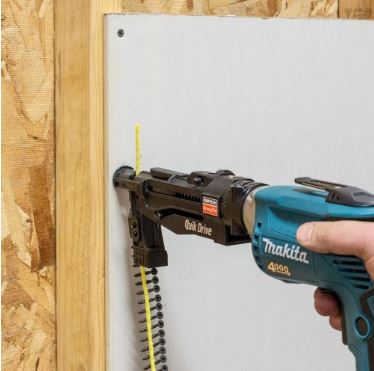
For long-term quality, we recommend using a screw gun and collated drywall screws for a fast, cost-effective drywall installation. Two competitive screw fastening systems, Senco DuraSpin and Simpson Quik Drive, offer best-in-class performance.
Another benefit to using screws over nails for drywall installation is that it generally takes fewer screws to complete the project. Pro Tip: Most drywall screws require a Phillips head drive.
Even for beginners, drywall installation is relatively easy to pick up. Just pay careful attention to the following:
Prepare for Installation
Be certain to consult your local building code before beginning drywall installation, as different regions have different requirements. Beyond building code, don't fall victim to silly, yet expensive errors. Gather all of your tools, and don't forget the small one. For instance, have a tape measure handy to maintain straight lines.
As damp wood dries out, it can lead to popping of fasteners and splitting at seams. Make sure the lumber you are fastening drywall board to is within an acceptable range of moisture content (less than 19 percent by most standards).
Make a Flawless Application
Don't overlook sagging panels, particularly when installing a ceiling. Make sure to drive extra screws into place while pressing firmly on the loose board. In some extreme cases, an additional brace or bracket may be required to guarantee a firm fit. Likewise, watch for bulging at your vertical seams. If the drywall board swells at the seam once it's been taped and sealed, it may require sanding. You can prevent this issue by ensuring there is no gap between drywall boards during installation.
Don't Take the Easy Route
Use a corner guard versus drywall tape and spackle. A corner guard will hold up better in the long run and is typically easier to work with than tape. You should also mark your studs and joists prior to installation of a drywall board. This will help improve the accuracy of your drive and will prevent additional repair work in problem areas.
Watch for Imperfections
Don't ignore bubbles, streaks, splits or other noticeable imperfections in drywall tape as it is laid. If air is allowed between the tape and base, it will lead to separation later on. Tape that is not secured properly can eventually peel and will require repair and repainting. In areas where warm and cold air are allowed to converge regularly, eventual loosening and separation of tape from the drywall base is almost inevitable.
Use the Proper Depth
Depending on the thickness of the board, determine the appropriate screw length and depth adjustment for your screw gun. Driving too deep can cause noticeable divets in the drywall. Driving too short leaves the screw's head protruding. If installed properly, the screw's head should sit slightly below the drywall surface, leaving just enough room for compound to smooth the surface.
To recap, make sure your framing is dry, mark your studs and joists for accurate drive locations, hold the drywall board firmly against the wood frame while fastening in place, line up boards for accuracy, scan and repair imperfections, and enjoy.
~ The Nail Gun Depot Team