

You May Also Like
Nail Gun Basics
November 25, 2013 2

Don't let using a nail gun be an intimidating experience. After all, everyone's got to start somewhere. Learn the basics right here at Nail Gun Network.
Step 1: Choose a Nail Gun
What type of project are you working on? It will impact your choice or nail gun—also known as a pneumatic nail gun or "nailer". Choose from: a framing nailer; brad nailer for light trim and molding, which uses small nails that won’t split wood; or a trim nailer, for slightly thicker nails than brad nails. Choose the nail gun that's best suited for your application. For most home DIY projects, such as decking and framing, you'll want a framing nail gun.
Step 2: Choose a Nail
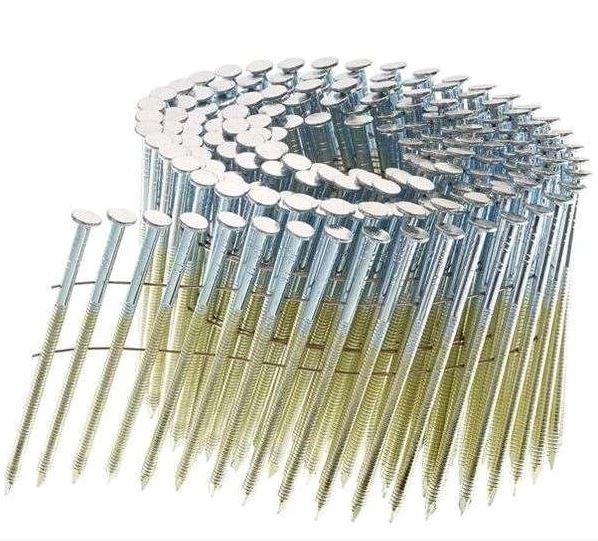
Strip or coil? This decision refers to the way the nails are attached to one another or collated, and subsequently, how they're loaded into the tool's magazine. Strip nails come in a paper or plastic strip, while coil nails (example, below) are attached by a wire coil weld. Coil nailers allow for less reloading, as they typically hold more nails. If you're doing a big job or are a contractor, this is the way to go. Most DIYers choose a strip nailer.
Clipped head or full head? Clipped head nails are just what they sound like, part of the head has been removed. This allows the nails to be collated closer together, which means more nails in the strip and less reloading. The holding power doesn't differ much, however, some coastal states still require full head nails for certain projects. Always check local building codes when building structures.
Galvanized or not? Galvanized nails are coated to resist rust and corrosion, so if you're completing an outdoor project or something that will be exposed to moisture, galvanized nails offer greater weather resistance. If money isn't an object (but superior corrosion-resistance is, opt for stainless steel nails).
Step 3: Decide How to Power Your Nail Gun
Nail guns can be powered by air, electricity, fuel or batteries. When you buy your nail gun you will need to know how it receives power. Most choose an air powered nail gun for its reasonable price point and ample power. However, air powered tools require an air compressor. Your nail gun will be attached to the compressor by a hose and will be either gas powered or electric.
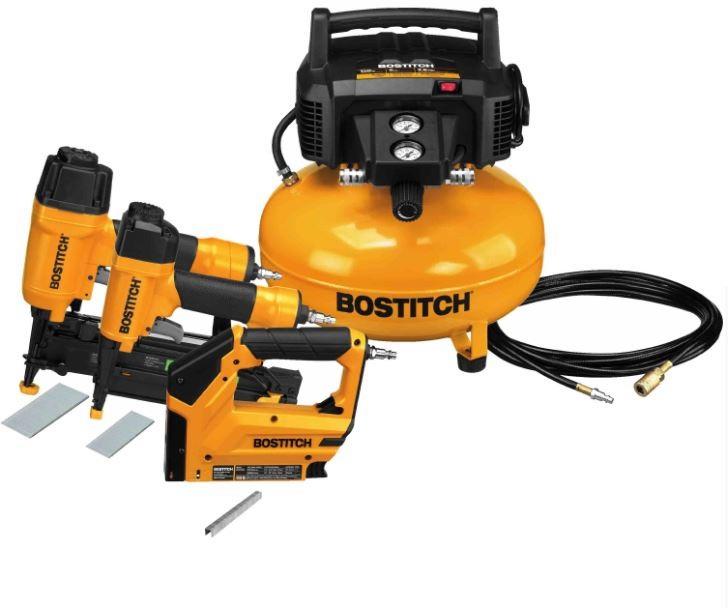
Some manufacturers offer air compressor and nailer kits, such as the Bostitch 3-Tool Finish and Trim Kit, below. The nice thing about power tool/compressor combo kits is that they take the confusion out of choosing a nailer, hose and compressor—plus you can get a little more bang for your buck.
Step 4: Ready, Load..
Load your gun according to the instructions. The strip nail guns are similar to loading a stapler. Pull back the magazine, insert the nail strip, and release the magazine to allow tension on the nail strip. To load a coil nail gun, open the magazine (inside there will be an adjustable nail tray). Set the tray for the length of nail that you are using. Insert the nail coil into the magazine. Toward the nose of the tool, you will find a “feed pawl” which guides the nails into the chamber. Be sure the wire and nail heads are aligned with the proper grooves.
Step 5: Fire!
Most nail guns require the nose to be pressed against a surface to fire. This is a safety feature so that the gun is not accidentally shot. There are usually two choices for operation: bump fire and sequential. Sequential requires you to pull the trigger each time you want to shoot a nail. Bump fire eliminates the trigger and fires each time the nail gun is pressed up against a surface
Beyond this, always read the tool manual, do some tests fires into scrap wood, and wear proper safety gear. Now you're on your way to hassle-free nailing!
~ The Nail Gun Depot Team
TOM
Air-powered nailers are tried and tested, with a solid reputation for quality and durability. Brands such as Paslode do air-powered and battery-powered nail guns very well. For regular use, most would agree that air power is slightly more reliable of the two options, but for household use, cordless eliminates the need for an air compressor, and is much more versatile.